Steps to Reinitialize Printer After Fuser Roller Swap
페이지 정보
작성자 Maxine 댓글 0건 조회 10회 작성일 25-10-09 07:18본문
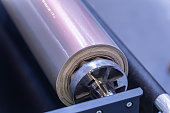
After replacing the pressure roller in your printer, it is critical to reinitialize the internal configuration to prevent operational errors. The pressure roller coordinates with the fuser unit to apply heat and pressure to bond toner, and when it is replaced, the printer may not acknowledge the new component unless its system parameters are reconfigured.
Begin by powering down the unit and disconnecting the power cord. Wait for at least one minute to allow any residual power to drain. Then, reconnect the power cable and restart the device.
Once the printer has completed its startup sequence, navigate to the main menu. Look for a menu option labeled maintenance, configuration, or tools. Navigate to the reset or initialization section. Some printers offer a explicit command خرابی غلطک پرس پرینتر to reset fuser. Select that option and confirm the reset.
If your printer lacks a labeled reset feature, check the user manual for a advanced initialization code, which may demand a specific timing sequence.
After completing the reset, run a diagnostic print to ensure print quality has been restored. If you still encounter issues such as feeding errors or smudged text, verify that the pressure roller was installed correctly and that all connectors are secure.
If problems persist, reach out to customer service for customized repair instructions.
Resetting the settings after a roller replacement maintains peak printer performance and maximizes the roller’s durability.
댓글목록
등록된 댓글이 없습니다.
