I use 100mil Spacing Ribbon Cable
페이지 정보
작성자 Chantal 댓글 0건 조회 131회 작성일 25-12-16 06:04본문
I used a 330 Ohm resistor but I think the circuit in the original Radica Mega Drive used a 270 Ohm one. As far as connecting up the Power button, I think it's just a simple case of wiring it all together to complete the circuit. It looks pretty ugly, but I think it's an essential step if you don't want wires flapping about and coming lose when you try putting the thing together (yes, this happened to me. So think very carefully before you go ahead with any soldering (this is a lesson I fail to learn time and time again). To make matters worse, I found that the wires didn't even have the length to stretch to the GPIO and also fit back into the case (soldering the wires to a veroboard and then connecting that up to the Pi GPIO is a better way to go about things). Other variations attach to anisible or can sit in the back of your case (tt-busboard-jr).
It served me well for a good few years until, if I remember correctly, it stopped being able to read discs (I still have the carry case I used with it though!). A few years ago, a friend of mine gave me a Raspberry Pi Zero for my birthday. I guess it's possible that many of my software difficulties would've been a lot easier to resolve if I'd had a Pi Zero W with easy access to the Internet for this project. If you look carefully, you can still see evidence of my failed attempt to solder the original control pad to the Pi's GPIO and that I broke the delicate plastic retaining thingamajig meant to hold a Pi Zero camera in place (No big deal. Each strand of the housing lies both on the inside and outside of the curve so on the average the wire path length remains constant, as does the housing centerline where the control cable resides. Finally, take your two shells and using an old toothbrush, scrub them in water and washing up liquid to remove any plastic remains. In the SATA specification this is referred to as hot plug and hot removal and they are two separate events.
As there exists various Hot-Plug events, there are relevant electrical and operational limitations for each of those types of events. When a Host or Device is declared Hot-Plug Capable without any qualifier, this shall imply that the SATA interface is Surprise Hot-Plug Capable. The connection of a SATA device to a host system that is already powered. The SATA device is already powered or powered upon insertion/connection. In addition to a leader device and one or more follower devices you need something that will provide power and pull-up resistors for the i2c bus. In some situations with many devices, a set of "pull-up" resistors are needed to help stabilize the i2c bus. It provides power and pull-up resistors for the i2c bus. I still managed to mess that up, mistakenly using all green wires for the LED and all orange for the power button. Turn it panel side up, check all the LEDs are at the right height. I used a permanent ink pen to make a mark through the pi mounting holes and I didn't get them all completely lined up, so maybe it would be smarter to measure them out first.
Make sure you do not put cable in the extra "GND" pads Put all eight 8-wire cables in, plus the single 2-wire cable. Because brake cables transmit force rather than position, SIS cable, even if safe, would have no benefit. Finally, you will need some cables. Depending on the amount of JB-Weld used on the corner screws, you might need to trim the PT-10 mount holes, making them like countersunk screw holes (tapered out). Unless you have a complicated setup, you probably won’t need to worry too much about this. My goal for this project was to preserve as much of the original console as I could, while keeping the "plug and play" functionality of the system intact. It doesn't matter which plug to attach first. Anyway, an introduction. These old plug and play systems were manufactured by Sega Toys and distributed in the west by Radica. I played around with it for a while, trying out various operating systems and what not. This inability to read discs, I believe, is a common issue typically caused by the laser wearing out (assuming dirt has been ruled out) - surely this can come about more swiftly if using scratched discs as the laser has to do more work to track and focus.
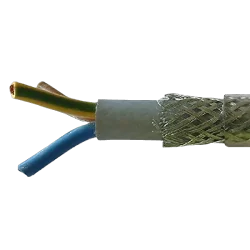
When you loved this article and also you would want to get details relating to what is control cable kindly stop by our page.
댓글목록
등록된 댓글이 없습니다.
